Voice dictation wasn’t used to create this article on how to use Google Docs’ voice typing, but it could have been. The service is actually very accurate and quite flexible, thanks to Google’s inclusion of basic formatting and editing commands. There’s a reason Google’s offerings remain a mainstay in our roundup of the best free Office suites.
Still, there’s an inherent lag between the issuing and execution of a command that makes the feature less than ideal for longer forms of content, where there could be lots of text or formatting changes—unless you have unlimited patience. But it’s a solid tool for creating documents like notes, agenda items, meeting summaries, or even first drafts of emails.
Getting started
Before you can use voice typing, you’re going to need a couple things: the latest version of Google Chrome and a functioning microphone connected to your computer. Not a fan of Chrome? This feature works in Microsoft Edge as well.
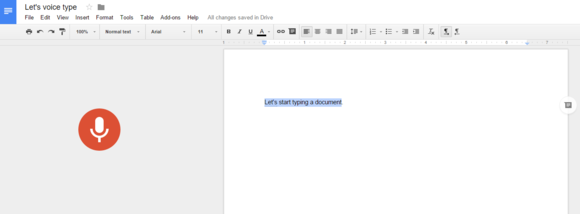
To start, go to create a new Google Docs file in either Google Drive or Google Docs. Once you’re in the new document, go to the top menu and select Tools> Voice typing, or press Ctrl+Shift+S on your keyboard.

Voice typing in Google Docs
If you navigated to Tools> Voice typing, a small pop-up window will appear to the left of your document with a dark microphone icon inside it. Click the microphone and it will turn red. If you instead used the keyboard shortcut, the pop-up window will show up already red. When you see that color, you can start speaking your text.
As you talk, don’t be afraid to pause and think about what you’re saying—Google will wait for you. Also speak slowly and clearly to reduce the number of mistakes you’ll have to correct. (Google sometimes completely botches its interpretation of what you say, no matter how clearly you enunciate.) Once you’re done, click the microphone or use the keyboard shortcut again to turn off the service.
If your microphone isn’t picking up your voice, verify that your input is set to the correct device. For Windows 10 and 11, you can quickly do this by right-clicking on the volume icon in your taskbar, then selecting Open Sound settings. Your active microphone will show in the Input section. If needed, use the dropdown menu to change it.
Formatting and editing
The most foolproof way to apply formatting such as bold or italics is to start by dictating a sentence like, “I prefer manual typing.”
TIP: Don’t forget you have to dictate your punctuation, so the above sentence would be spoken aloud as, “I prefer manual typing period.”
Next say, “select ‘I prefer manual typing.’”
Followed by, “apply italics” or “apply heading two,” or whatever your preferred formatting is.
Making itemized lists is a little more natural since you can say, “create bullet list” or “create numbered list.” Then dictate your list, saying “new line” between each item. When you’re done with your list say “new line” twice to end the list formatting.
Thankfully, Google also includes the all-important “undo” command in voice typing for those times when you mess up.
For a complete list of Google’s voice typing commands, check out the company’s help pages.
One last thing to keep in mind is that Google’s voice dictation is like having your own digital secretary. A very literal secretary. If you get frustrated and start asking yourself a question like, “What the f*** just happened?”, Google won’t realize that wasn’t supposed to be part of your document. So be careful what you say, and proofread everything.
Note: When you purchase something after clicking links in our articles, we may earn a small commission. Read our affiliate link policy for more details.

